
Organising project files to optimise my workflow
Working as a full-time freelance graphic designer means much more than just making pretty visuals. Behind every final packaging design, logo, or revamped brand identity lies a well-organised and efficient workflow, an essential component of working effectively with multiple clients at once. And after some years of experience (read: trial-and-error), I’ve landed on a solid system that clears my mind rather than clutter it.
In this blog post, we'll delve into how I organise my project files to optimize my workflow and make it easier to work on different projects simultaneously.
Whether you're a fellow designer seeking organisational inspiration or a client curious about the behind-the-scenes magic 🪄, welcome to the core of my creative process: my workspace, where design meets structure in perfect harmony 🫶.

An overview of what a project or client folder would include. Below, I’ll be delving deeper into why each folder is important.
1 & 2: Work files & decks (presentations)
The first folder is where I do all of the work and clients don’t get to see this one. It contains all the raw working files relevant to the project, from work-in-progress designs to draft decks. The latter are placed in the “decks” folder upon completion. This way I can reference back to them easily throughout the project, as well as when I’m working on similar projects in the future and want to look at a specific part of my process.

The files within these folders are also clearly named so I can always look back at a project and find exactly what I’m looking for. 🕵️
3 & 4: Final logo files & brand assets
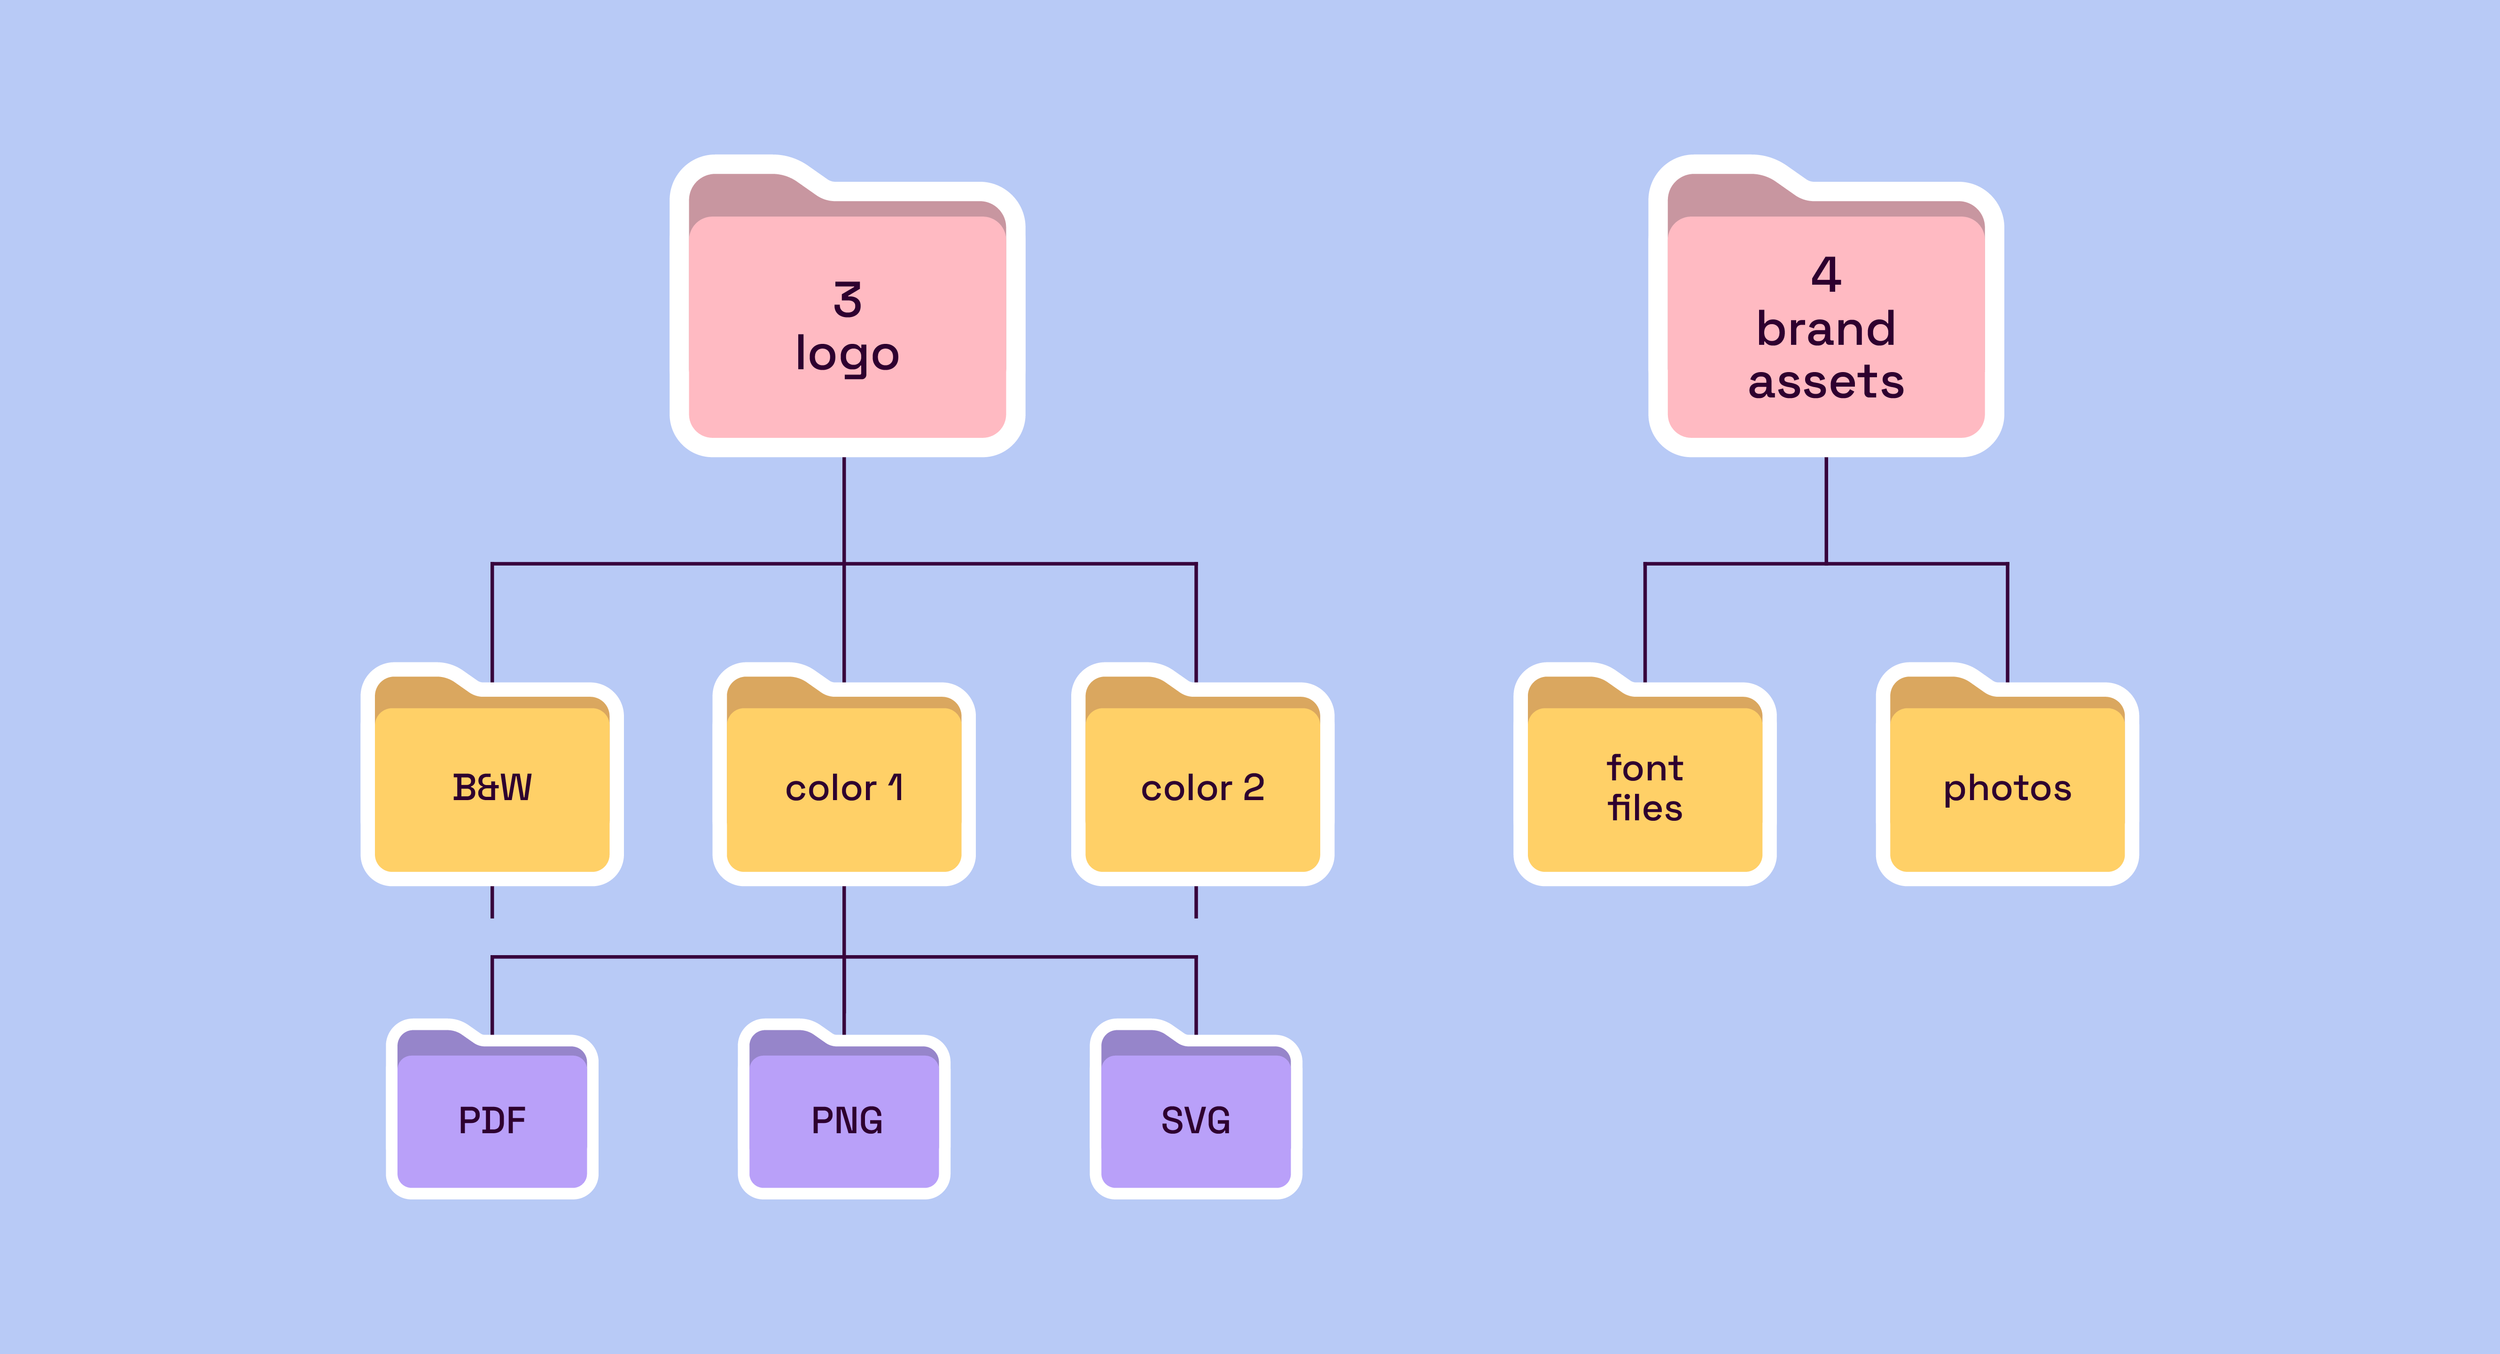
This is where all final logos and brand assets go. Depending on the brand, there will be more or less logo variations and brand assets, so the sub-folders present here are tailored depending on the client. I also add an editable Illustrator file with all the final logos in the logo folder.
5 & 6: All brand extras & brand guidelines

Depending on what the collateral is, each folder will have more sub-folders for variations & formats. The brand guidelines folder will have the main brand guidelines deck & the mini guidelines.
7: For your portfolio!
Here is where I’ll save all of the files ready to go for my portfolio. This way, I’m able to easily find those final files to upload to the listed sites.
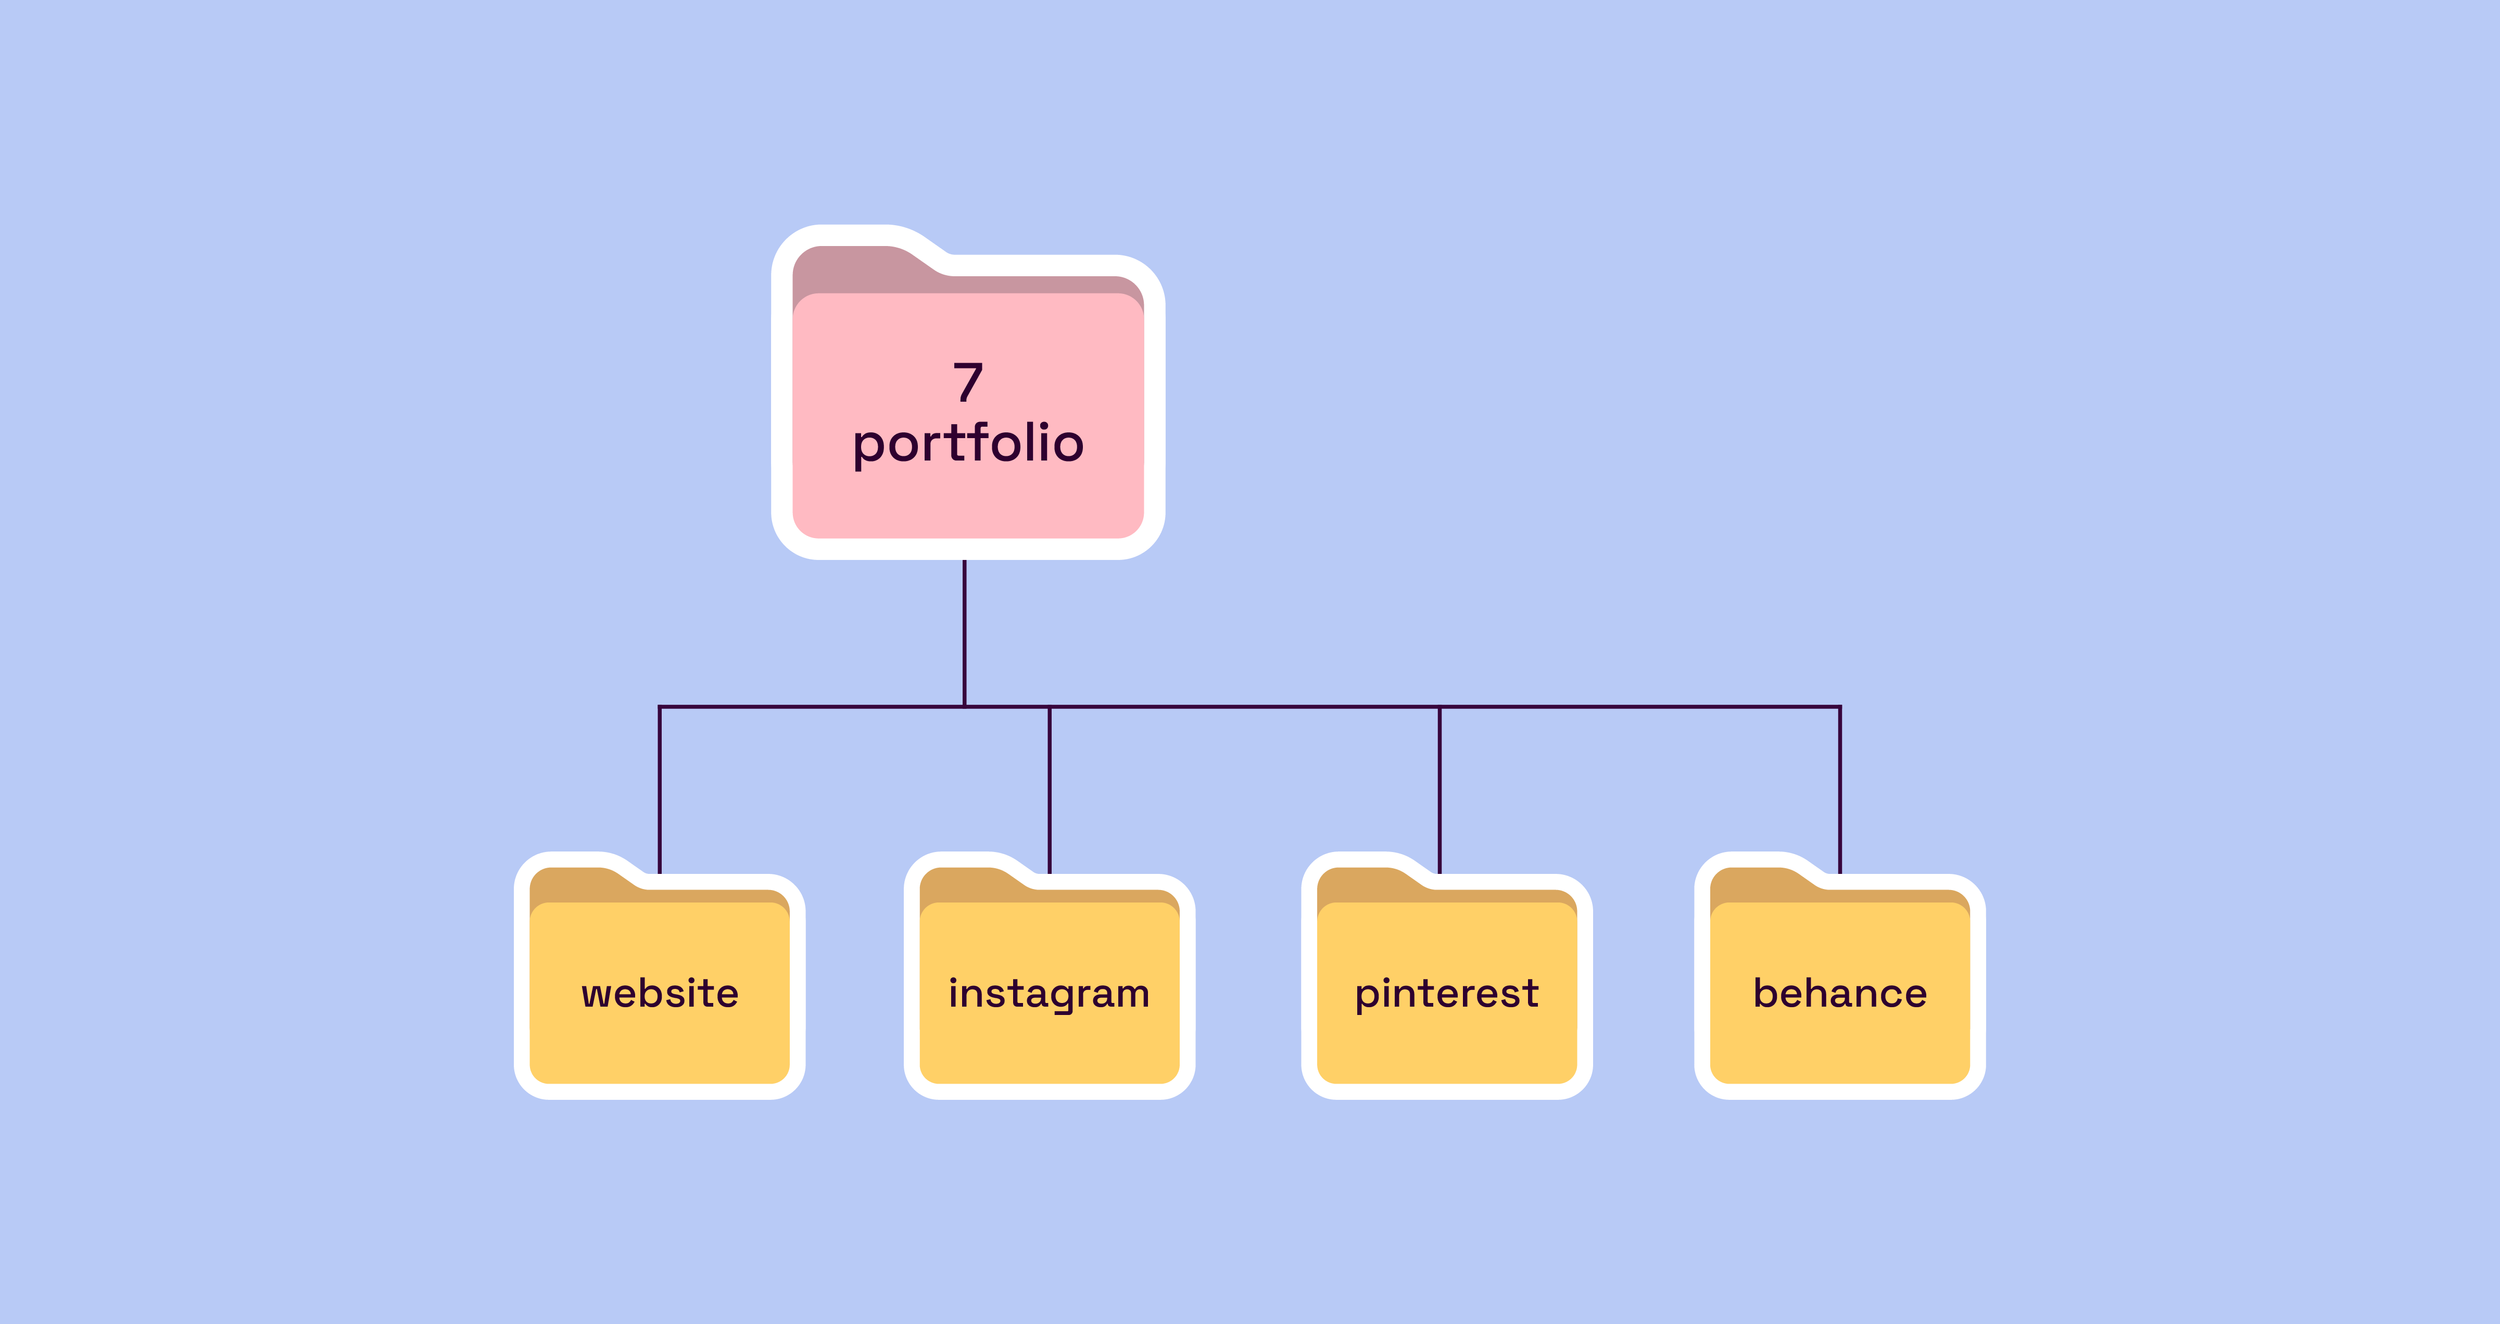
This folder also acts as a reminder for me throughout the project process to adapt any visuals for my portfolio once the project is complete (because as designers we are constantly forgetting to add our beautiful completed designs to our portfolios 🫠).
Below you can see what some of the file names may look like in each of the folders! If you’re a client, you will typically only receive folders 3 (logos), 4 (assets), 5 (collateral) & 6 (guidelines).
Ready to optimise your workflow? 🪄
No successful freelance designer can afford to be disorganised. While it might not appear to come naturally to creatives, having a well-structured virtual workspace actually frees you from the hassle of file organisation and lets you focus on what’s important to you and your clients — the actual designs.
If you want to transform your workflow, feel free to incorporate these file organisation tips into your next project. If it works for me, chances are it might work for you too 😇
In case you have questions or want to let me know if this tip worked for you, reach out via Instagram.